Material Sources:
1. foam - Dow Styrofoam TM, Square Edge Insulation (blue in color), building supply stores (I got this from Lowe's national chain of home improvement stores).
2. glue - Original Gorilla Glue widely available in stores and on-line.
3. covering film - Aerolite (Solite-W) – available on-line.
Special jigs:
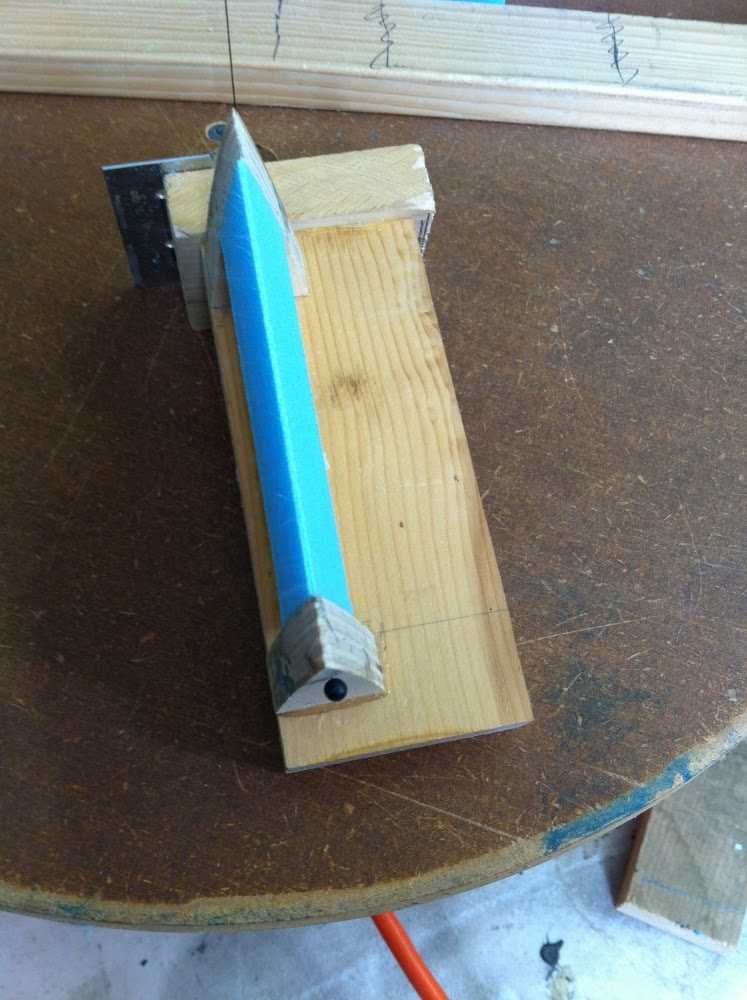
1. strut holder - see photo (very simple to make this). Used for both glue up and covering.
The struts need to be faired. After a lot of thinking, I decided on a foam rib approach using a NACA streamline form, finess ratio (length to width) of 4.500/1.145 or 3.93. This ratio just “looked” about like what I was thinking, no magic engineering. I created the full scale profile template by downloading the NACA 20 streamline shape data into OpenOfficeCalc (freeware version of MS Excel) and rescaling it to get something slightly over 1” thick. This gives me a rib profile that has enough of a wall thickness (just a bit over 1/16”) to be able to slip it over the 1.0” strut tube without tearing out. Here are my notes on figuring out what foam to use;
1. foam - Dow Styrofoam TM, Square Edge Insulation (blue in color), building supply stores (I got this from Lowe's national chain of home improvement stores).
2. glue - Original Gorilla Glue widely available in stores and on-line.
3. covering film - Aerolite (Solite-W) – available on-line.
Special jigs:
1. strut holder - see photo (very simple to make this). Used for both glue up and covering.
The struts need to be faired. After a lot of thinking, I decided on a foam rib approach using a NACA streamline form, finess ratio (length to width) of 4.500/1.145 or 3.93. This ratio just “looked” about like what I was thinking, no magic engineering. I created the full scale profile template by downloading the NACA 20 streamline shape data into OpenOfficeCalc (freeware version of MS Excel) and rescaling it to get something slightly over 1” thick. This gives me a rib profile that has enough of a wall thickness (just a bit over 1/16”) to be able to slip it over the 1.0” strut tube without tearing out. Here are my notes on figuring out what foam to use;
Lowe's – Dow Styrofoam TM, Square
Edge Insulation board (blue)
comes in 0.55,0.78, 1.0, 1.5, 2.0, 2.5,
3.0, 4.0 thick boards 2X8 and 4X8 sheets
Home Depot – Corning Formular 150
(pink)
material density
-
Aircraft Spruce blue foam (9.0 oz/16 oz/lb)/(0.5/12x2x4 ft3) = 1.69ft3
-
Square Edge33.85 oz/16 oz/lb/(2/12x2x4 ft3) = 1.59 lbs/ft3
-
Formular 150 1.31 lbs/ft3
Formular
vs Square Edge compressive strength is stated at 15 vs 25psi so I'm
choosing Square Edge.
Guess fairing to be approx 60% of a
1x5x44 stick and there are 14 of them (7 per side)
.6x(1x5x44)x1 ft3/1728 in3 = 1.07 ft3
of foam for all the fairings
amounts to 1.69-1.59=0.1 lbs or 1.6 oz
difference between the two foams (and the Dow stuff is both cheaper
and lighter) I see no advantage in using Aircraft Spruce foam not to
mention it is extremely expensive.
At 1.59lbs x 1.07 ft3 = 1.7 lbs for
the fairings minus pi x 1” cut out of the middle which I'm
guessing to be 50% of the fairing profile area. This would leave
maybe 1.0 pound of material for the fairing plus whatever I end up
using to cover it (Monofilm) and the trailing edge strip which I
plan to use balsa for the initial proto.
The aluminum fairings (there were only
6 per side) weighed in at 34.3oz (2.14 lbs without the tape or
rivets)
So, I expect roughly half the weight to
do foam fairings vs aluminum and also they should be less drag.
Dow Square Edge showed no problems at
225F from the fabric iron. Should tolerate all the model iron-on
films out there.
A bit of research on the internet
revealed Gorilla Glue to work well in gluing foam. I tried a sample
and saw the foam fail and not the glue-foam joint. Now for the
fabrication process....
My idea uses ribs, leading edge and
trailing edge beams glued together with a polyurethane waterproof
glue marketed as Gorilla Glue and is widely available.
THE RIBS
I decided to rough-cut a template from
plywood for the ribs and then sand it to the exact profile using a
vertical disc sander. The first step was to drill a 1.0” hole
through the plywood. I used cabinet grade since I will need to make
several hundred ribs. I then positioned the paper profile over the
1” hole as close as I could to center and traced out the pattern
onto the plywood. Next I rough cut to the outside of the profile
using a band saw and then carefully sanded up to the line using a
disc sander. I drilled a couple holes on each side of the template
and drove some smooth shank nails flush to the surface.

I bought a 1/2” router bit with a
bearing on the shaft end to ride against the plywood form mounted in
a cheap router table I borrowed. I had access to a hot wire set up
so didn't need to make my own. I did find that I wanted to replace
the nichrome wire which was too thick with a stainless steel fishing
leader I ordered from Cabela's. Too small of wire cuts too slow and
to large a wire transfers too much heat....trial and error….depends
on your power supply.
I wanted these ribs to be ½ inch thick
so I needed to cut slabs from a large, 2 inch thick stock sheet to
start with.

Starting the cut

Almost complete

Ready to trim that tail

Perimeter cut done

Cutting the strut through hole

Pop it off the template for a completed rib
THE INTER-RIB BEAMS
I arbitrarily chose a 3 3/8ths inch
spacing between ribs and fabricated both a trailing edge and leading
edge beam to form a complete structure for the film covering I used.
The leading edge beam was 5/8 thick and the trailing edge beam was 1
inch thick. This structure formed a strong enough frame to support
the monofilm covering I used and proved to be more durable than I had
anticipated for normal set-up and break-down wear and tear.
Here is the completed trailing edge
form jig lying on the hot knife table

In this next shot the block of foam is
in the form jig held by shoving a hat pin into it through the hole I
drilled in the form. This helped to keep the foam from shifting
while doing the cutting.

In this shot, looking down onto the hot
knife table at the form, I have just finished the first cut.

The completed beam ready to be put in
the finished pile.
The leading edge beams were made using
the leading edge profile and a form just like the trailing edge form.
This shot shows the strut with all the
ribs in place ready for the beams to be glued in.

I used small rubber bands and hat pins to hold the
ribs against the beams while the glue set up. Using glue sparingly made this unnecessary. I also found that the Gorilla Glue gets tacky fairly quickly so one can move from one rib assembly to the next without any wait time. It takes me about 1 full day to complete one side so for both wings I'm into 2 days to get the entire set ready to cover with the monofilm.

I used a flat 2X4 with a long piece of
180 grit self adhesive sandpaper as my sanding bed to even up any
topography problems that came up as a result of me not aligning the
beams and ribs exactly and also to make the trailing edge a straight
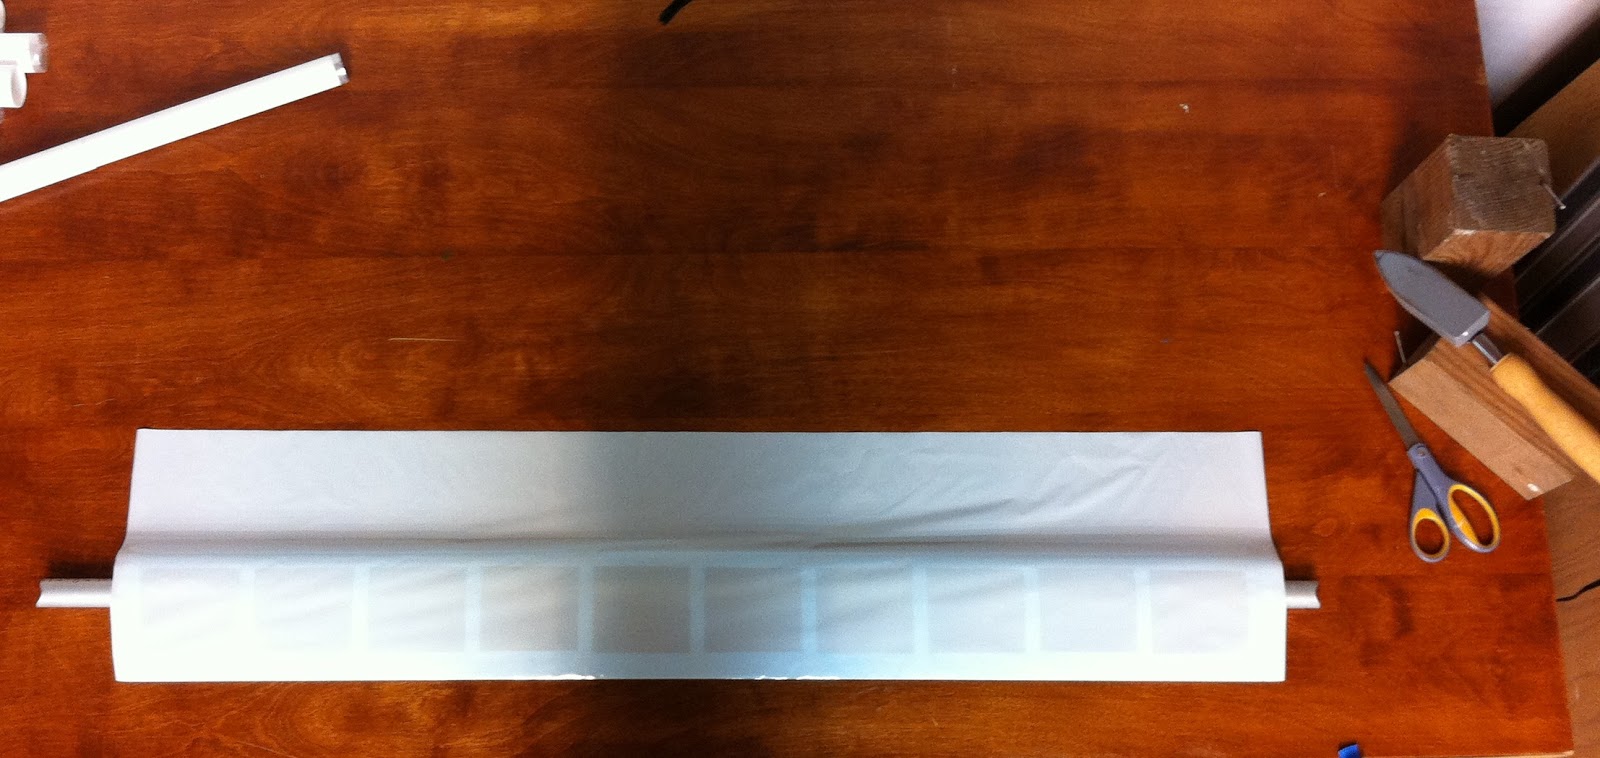
line. I used monofilm applied with a hot iron exactly as in model
plane covering. This is a shot of an end piece of film I applied first
before covering the main part of the fairing.

Laying out the main sheet of monofilm
to begin the covering process.
Before heat shrinking
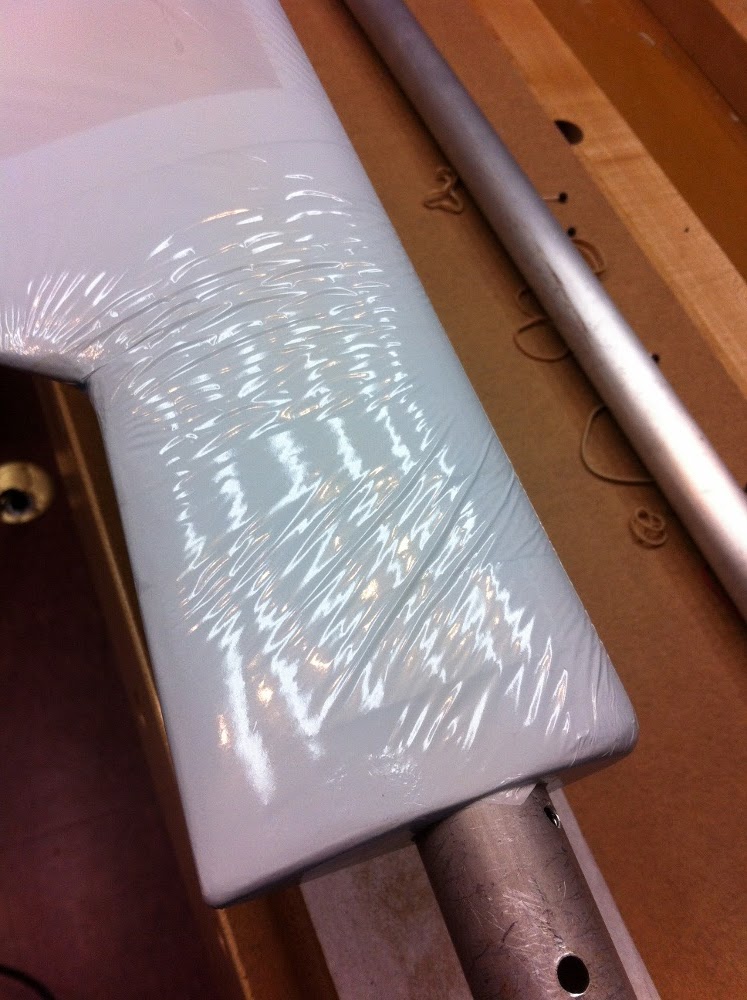
After heat shrinking.....magic!

Once the fairing was completed it
became clear that the router template I made to produce all the ribs
had just the right size hole on it to thread the ribs onto the strut
without breaking them and produced enough friction that the fairing
can be rotated but will easily stay in position once I align it. I
made an alignment “wrench” to do this.


I used this "wrench" to set the fairing angles and then only found it rarely needed again since there is enough friction against the strut to keep them in position unless they are really bumped hard.
It took some trial and error to figure
out how much clearance I needed on each end of the fairing to clear
the cable swages. The main problem is how the plans had you rig the cables.
All of them are double swaged (for no clear reason) and the
main swage nearest the bracket was pulled so tight (there's a drawing
in the plans on this) so as to ride right up onto the bracket plate
making it very hard for it to rotate and also putting the second
swage a couple inches or more out onto the cable causing interference
with the fairings I'm trying to install. I had to provide nearly 4
inches of unfaired, clear strut on the middle positions for both leading and
trailing edge to keep those fairings from being ripped up on fold
down. Even with the extra clearance I fold both middle negative
wires to the other side of the bracket on tear down to avoid contact
with the fragile fairing. As it is I fabricated a foam block about 4
inches thick for the root end of the leading and trailing edge at the
lower wing panel bracket and glued velcro on the aluminum gusset and
the block to hold it in place while folding the panels down. These
blocks keep the wings from collapsing completely thus avoiding
smashing the inboard fairings against the ribs. I still have some
deformation but it's acceptable. This way I can leave the fairings
in flying alignment in the collapsed transport mode without having to
worry about having them move out of position by the wing ribs.
Next, I made two foam cases for each
set of diagonal struts to protect their fairings during transport
since it is so easy to tear the monofilm covering which is easy to
repair but a nusance I prefer to avoid.


Here is how they look installed in my trainer. You can see the foam rib-beam structure in the backlit photo. I have had no issues flying with these fairings and they are surprisingly durable.


Hi John, we talked many years ago, 2018. I am finally getting to start on my EZ and would like advice if you don't mind. I sent you an email for the old 2018 email address I have for you.
ReplyDeleteDavid